Ever since I started my venture in to photography I have dreamed about owning certain lenses.
First, was to own the Nikon AF-S 70-200 f/2.8 VR lens, which is one serious piece of kit. It is legendary for its handling and sharpness. At the time I could not afford to buy one, so I settled on a Sigma HSM 70-200 f/2.8 lens, while having great image quality was just not in the same league as the Nikon.
My second dream lens was the Nikkor AFS 500 f/4, which I actually purchased couple of years back which totally blew my budget for any other exotic lenses. This 500/4 is a serious dream lens and a pleasure to use and abuse.
Recently, I started having them recurring dreams about the Nikkor 70-200 and my search for a good secondhand example begun. I was lucky to stumble upon a eBay auction for an physically damaged lens, which seemed to still be working fine.
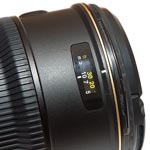 After some bidding I managed to pick the lens up for less than 40% of the going secondhand value. The lens itself was clean and came boxed with the hood, soft case and unused strap. I tested it out on my D200 and it performed as expected and the test images were sharp beyond believe.
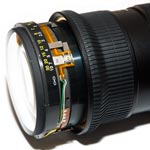
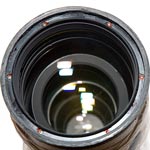
The damage was not that visible, it appeared that the lens had been dropped on to its side causing a crack to the top housing and distorting the filter threads. I managed to track down a service manual just to see how easy it would be to replace the damaged components.
 The procedure would be easy – unscrew the front beauty ring and then unscrew the front protector ring, followed by removing the top housing. So simple I was on the phone to Nikon parts department ordering up the parts, $85 (£45) later I had the parts winging their way to me.
The Repair
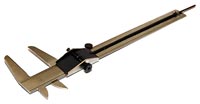 Using a modified verneir I attempted to remove the front beauty ring – this idea failed. Next I thought well the beauty ring is mounted on the protector ring which needs to be unscrewed anyway, so skip that and remove the protector ring first. That was not happening either!
Quick look at the service manual revelled something I missed, the protector ring appeared to be installed using some screwlocking compound (which probably explains why it was not moving at all). Also I think the fact that the protector ring had been distorted was not going to be easy as just unscrewing it.
 I studied the replacement parts and I noticed that when the protector ring is screwed down on to the top housing it stops just by the gold beauty ring that surround the top housing.
My plan of action was to remove the gold beauty ring (which was already cracked, so it just came off), then using a small hack saw to cut through the top housing till I got to the protector ring threads.
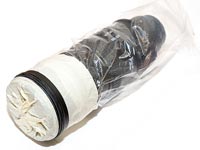
So to protect the lens from debris I taped the front up with masking tape, and also taped a plastic bag to the rest of the lens below my cut line. I started the cutting – slowly working my way round. The hack saw was making easy work of the plastic and after a minute or so I had done it.
A gentle pull and the front came away with the protector ring and beauty ring still attached to it. I could now see the 6 screws which attach the top housing to the lens.
The Fitting
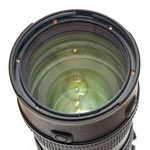 So I started to fit the replacement parts. First I installed the top housing – making sure the 6 screws where well tightened. I had to transfer the focus distance window from the old housing to the new one, which was very simple.
Next I smeared some screw locking compound on to the thread of the protector ring before screwing that down. To tighten it I attached a cheap UV filter to the front and used that to get more leverage, I had to wait for the screw locking compound to set before trying to remove the UV filter otherwise the protector ring would have unscrewed with it!!
Finally I was able to re-install the beauty ring using my vernier calapers. This part is probably the scariest as a small slip could mean damage to the front glass.
The Finished Product
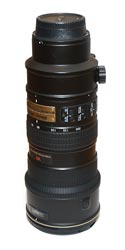
So here is my lens looking factory new. I purchased the lens not really worried about the damage but after discovering the price of the parts and the fitting procedure it was a repair well worth doing…..
Disclaimer : Due to the world of litigation and general stupidity, I need to warn you that everything you read is for information only – if you decide attempt anything because of what you have read here then you do so at your own risk. You have been WARNED !!


Hi there,
I liked your write up on the 70-200. I try to do most of my own repairs / cleanings, but only do so when I have the proper technical manuals / YouTube vids. I need to do a cleaning of my Nikon 70-200 VR1, but can’t find a repair manual for the lens. Would you mind sharing the maunual or point me in the right direction? Thanks so much!!
Dejan
@Rafal – I would suggest speaking to your local Nikon distributor, if that is a dead end I have found Nikon USA Parts department to be very helpful for hard to source bits.
Hello
where can i buy electronic PCB (it is not reduction VR) to my Nikon 70-200VR
I can not find the shop:(
Can you help me please
Rafal
This seem to only source of that VR1 manual at the moment. Is that something I can get ?
hiya!
can anyone mail me a link for a repair manual pls pls?
i cannot find it anywhere:(
Sergey posted a link to parts list only :/
big thanks in advance!!
mike@mzajac.eu
Hi Tarkan
nice job!!:D
@Sergey thanks for repair manual!:D
i’ve got some haze on mine – probably so..its time to remove it. btw..nikon repair prices are just unbelievable! + they make mistakes in their calculations.
i just wanted to warn everyone – here in london theres one of authorised nikon service – fixation.co.uk. i’ve hade some problems with my d700 body and flashgun syck so i droped my camera to them and ..imagine – they wanted to charge me approx £1000!! so i took my camera and..everything worked fine – no idea what happened or what they did but.. fixation.co.uk its a bunch of robbers! they put on last place of estiamtion place small parts for £500. i sent complaint to nikon and they responded that it was a ‘typographical error’ cuz it should be £5. i like nikon gear but nikon service – try to avoid !!!
Hi Marco can you email me a link or a pdf of same manual
I can find it anywhere here in usa
LOU
sbiphoto@aol.com
exact same problems they want 535 dollars and lens works fine
Nikon UK are a hard bunch to deal with. Few years back they would sell some parts and you had to jump through hurdles to get them.
As of 2010, Nikon UK do not sell any parts directly to end-users, parts are only sold to approved repair centers.
Nikon Germany, sounds like the place to get the parts from – or – Nikon USA who are also very easy to deal with.
I have not tried it with the ruler, because I still have not found replacements.
As soon as I find the parts I will try and I will let you know. In May I will be in London,
@Tarkan : you think that I can go and buy directly from Nikon UIK ltd (380 Richmond Road)?
Nikon UK do not ship outside of England.
greetings
Marco
Hi Martin,
Depending on how dented it is – I would try the advice I gave Marco, remove the rubber bumper and cut slots, using a flat steel ruler or similiar for leverage unscrew.
Last response I got from Marco was the dent had distorted the top housing, so then just follow the info in my article to remove the top housing.
@ Marco: I have the same problem with only filter ring dented, you can get spare parts from Nikon service point. Mine is in cologne/Germany, Albrecht Kamera Service, Longericher Straße 205, 50739 köln Bilderstöckchen.
I have the comfort of having that Service Point just a few min away from my flat.
Were you successfull removing 1c999-172? If yes, how? (Nikon wants to charge me 65€ for the labour/work, and being an engineer with a toolbox at home, im not quite willing to pay that.
Nothing can not be opened ….. I think that the only way is follow your guide.
The problem are the spare parts, here in Italy don’t give them, and the Service Repair costs 350 Euro! Where did you purchase this parts? I can order it from italy?
many thanks
Marco
Great idea, I’ll try!
thanks again
Marco
Hi Marco,
The beauty ring 1C999-172 can be unscrewed from the housing 1C999-183, but it will be very difficult according to the manual the thread is meant to be cemented.
1C999-172 does have some small cutouts close to the lense which a tool is meant to lock in to so you can screw it out. If your 1C999-172 is damaged I would remove the soft rubber trim with a knife and then using a saw cut two slots opposite each other into the protector ring, make the slots you cut wide enough so you can place a steel ruler or another straight piece of metal across.
Then you can get enough leverage to unscrew 1C999-172 from the lens.
Good Luck and be careful you do not damage the optics.